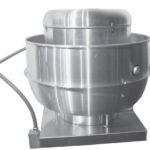
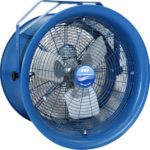
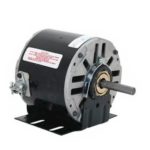
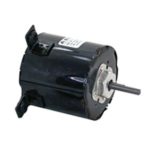
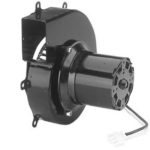
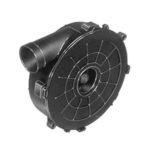
In commercial kitchen exhaust systems, understanding CFM (Cubic Feet per Minute) and static pressure is crucial for designing an efficient and effective ventilation system. Let’s break down these concepts:
CFM (Cubic Feet per Minute):
- CFM is a measure of the volume of air moved by a fan or ventilation system per minute.
- In the context of kitchen exhaust, CFM is used to quantify the amount of air that needs to be removed from the kitchen to maintain a safe and comfortable environment.
- The CFM requirement is determined by factors such as the size of the kitchen, the type and quantity of cooking equipment, and local building codes.
Static Pressure:
- Static pressure is the resistance to airflow in a ventilation system. It is the pressure exerted by the air against the walls of the ductwork, filters, dampers, and other components.
- High static pressure indicates greater resistance, and the fan must work harder to move air through the system.
- Kitchen exhaust systems often have components like hoods, filters, and ductwork, which contribute to static pressure. Designing the system to minimize static pressure is important for maintaining optimal airflow.
Considerations for Commercial Kitchen Exhaust Systems:
Hood Design:
- The design of the kitchen hood plays a significant role in capturing and containing cooking emissions. A well-designed hood helps minimize the spread of heat, grease, and odors.
CFM Calculation:
- The CFM requirement is determined based on the type and quantity of cooking equipment. Different appliances have specific CFM guidelines to ensure effective capture and removal of pollutants.
Ductwork Design:
- Proper ductwork design is critical to maintaining low static pressure. Smooth, properly sized ducts and proper installation help minimize resistance to airflow.
Balancing CFM and Static Pressure:
- Designing a kitchen exhaust system involves a balance between providing sufficient CFM to capture and remove pollutants and maintaining low static pressure to ensure efficient airflow.
- Selecting the right exhaust fan with an appropriate CFM rating for the system’s requirements is essential.
Variable Speed Controls:
- Variable speed controls on exhaust fans can help adjust airflow based on the cooking load. This can improve energy efficiency and maintain optimal static pressure.
Code Compliance:
- Compliance with local building codes and standards is essential to ensure the safety and effectiveness of the kitchen exhaust system.
In summary, a well-designed commercial kitchen exhaust system requires a careful balance between providing the necessary CFM to remove pollutants and minimizing static pressure to ensure efficient airflow. Working with HVAC professionals and following industry standards is crucial for designing and installing an effective kitchen ventilation system.
Direct drive and belt drive are two common types of configurations for centrifugal exhaust fans, and they differ in the way the fan motor is connected to the fan impeller. Here are the key differences between direct drive and belt drive centrifugal exhaust fans:
Drive Mechanism:
- Direct Drive: In a direct drive configuration, the fan motor is directly connected to the fan impeller. The impeller is mounted directly on the motor shaft, eliminating the need for a separate belt and pulley system.
- Belt Drive: In a belt drive configuration, the fan motor is connected to the fan impeller using a belt and pulley system. The motor and impeller are not physically connected but are linked through a belt.
Motor Location:
- Direct Drive: The motor is located in close proximity to the fan impeller. This compact design is often preferred for applications where space is limited.
- Belt Drive: The motor can be located at a distance from the fan impeller, allowing for more flexibility in the installation. This setup is often used when a specific arrangement is required for space considerations.
Maintenance:
- Direct Drive: Direct drive fans are generally considered low maintenance because they have fewer moving parts. There are no belts or pulleys to replace, and the system is more straightforward.
- Belt Drive: Belt drive fans may require more maintenance because the belts can wear out over time and need to be inspected and replaced periodically. Additionally, pulleys may need adjustment.
Efficiency:
- Direct Drive: Direct drive fans are often more efficient because there are fewer energy losses associated with the direct coupling of the motor to the impeller.
- Belt Drive: Belt drive fans may have slightly lower efficiency due to energy losses in the belt and pulley system.
Cost:
- Direct Drive: Direct drive fans are typically more cost-effective in terms of initial purchase and installation costs. They are simpler in design and have fewer components.
- Belt Drive: Belt drive fans may have a higher initial cost due to the additional components (belts, pulleys) and potentially higher installation complexity.
Flexibility:
- Direct Drive: Direct drive fans are more rigid in terms of speed adjustment options. Changing the fan speed may require changing the motor or using external speed control devices.
- Belt Drive: Belt drive fans offer greater flexibility in adjusting fan speed. Speed changes can be achieved by adjusting the pulley sizes or using variable speed drives.
When choosing between direct drive and belt drive centrifugal exhaust fans, factors such as space constraints, maintenance considerations, initial costs, and the need for speed adjustment options should be taken into account. Both configurations have their advantages, and the choice depends on the specific requirements of the ventilation system.
Safety Precautions: Before starting any work, ensure that the power supply to the motor is turned off to prevent any electrical accidents.
Access the Motor: Depending on the type of motor, you may need to remove a cover or housing to access the capacitor. This may involve unscrewing or unclipping the cover.
Identify the Capacitor: Locate the capacitor, which is a cylindrical or oval-shaped component with wires attached to it. Make note of how the wires are connected before you remove the old capacitor.
Discharge the Capacitor: Use an insulated screwdriver with a plastic handle to short the terminals of the old capacitor to discharge any stored electrical energy. This step is crucial for your safety.
Remove the Old Capacitor: Disconnect the wires attached to the old capacitor. Take note of their positions to ensure correct reconnection later. Unscrew or unclip the capacitor from the motor.
Install the New Capacitor: Match the specifications of the old capacitor with the new one, ensuring that it has the same voltage and microfarad (μF) rating. Install the new capacitor in the same position as the old one.
Reconnect the Wires: Connect the wires to the new capacitor, ensuring that they are connected to the appropriate terminals based on your earlier notes.
Test the Motor: Turn the power supply back on and test the motor to ensure that it starts and operates properly.
If you’re unsure about any of the steps or encounter any difficulties, it’s advisable to consult a professional electrician or a technician who can provide guidance or assistance. Working with electrical components can be dangerous, so it’s crucial to prioritize safety and precision during the replacement process.
Replacing the belt on an exhaust fan is necessary when the belt becomes worn, damaged, or broken, causing the fan to operate inefficiently. Here’s a general guide on how to replace the belt on an exhaust fan:
Turn Off Power: Before beginning any work, ensure that the power supply to the exhaust fan is turned off to prevent any accidents.
Access the Belt: Remove the cover or housing of the exhaust fan to access the belt assembly. This step might involve unscrewing or unclipping the cover, depending on the specific model of the exhaust fan.
Locate the Belt and Tensioner: Identify the belt and the tensioner pulley. Note how the belt is threaded through the system before removing it.
Release Tension: Release the tension on the belt by either loosening the tensioner pulley or moving the motor to create slack in the belt. This will make it easier to remove the old belt.
Remove the Old Belt: Slip the old belt off the pulleys and remove it from the system. Take note of the belt’s orientation and the way it was threaded through the pulleys.
Install the New Belt: Position the new belt over the pulleys in the same configuration as the old one. Ensure that the belt is properly aligned and seated on the pulleys.
Adjust Tension: Adjust the tension on the new belt by either tightening the tensioner pulley or adjusting the position of the motor to create the proper tension.
Test the Fan: After replacing the belt, turn the power supply back on and test the exhaust fan to ensure that it is operating smoothly and effectively.
If you encounter any difficulties during the process or if you are unsure about any of the steps, it’s recommended to consult a professional technician who can assist you further. Working with mechanical components can be challenging, so it’s important to prioritize safety and precision during the replacement process.
Materials Needed:
- Electric motor speed controller
- Electric motor
- Power source (battery or power supply)
- Wiring and connectors
- Screwdrivers
- Wrenches
- Insulating tape
- Wire stripper
- User manual for the speed controller (important for specific instructions)
Instructions:
Read the User Manual: Before starting the installation process, thoroughly read the user manual that comes with your electric motor speed controller. This manual will provide specific instructions and safety guidelines that you must follow.
Choose a Suitable Location: Select a suitable location to install the speed controller. Ensure it is well-ventilated and away from moisture or extreme temperatures.
Power Off: Before connecting any wires, make sure the power source is turned off to avoid electrical shocks.
Connect the Motor: Connect the electric motor to the speed controller according to the wiring diagram provided in the user manual. Typically, this involves connecting the motor leads to the designated terminals on the speed controller.
Connect Power Supply: Connect the power supply (battery or power source) to the speed controller. Follow the wiring diagram to connect the positive and negative terminals appropriately.
Check Voltage Compatibility: Ensure that the voltage rating of the motor matches the voltage output of the speed controller. Using incompatible voltages can damage the motor or the speed controller.
Secure Connections: Tighten all connections using screwdrivers and wrenches. Make sure that there are no loose wires that could
Replacing a sheave or pulley on a motor requires careful attention to detail and precision to ensure the motor functions properly. Here’s a general guide on how to replace a sheave or pulley on a motor:
Safety Precautions: Before you begin, make sure to turn off the power supply to the motor to avoid any accidents.
Access the Motor: Depending on the motor’s design, you may need to remove a cover or housing to access the sheave or pulley. This step may involve unscrewing or unclipping the cover or housing.
Release the Tension: If the sheave or pulley is connected to a belt, release the tension on the belt by either loosening the tensioner or moving the motor to create slack.
Remove the Belt: Slip the belt off the sheave or pulley, ensuring you take note of the way it is threaded through the system for reinstallation.
Detach the Old Sheave or Pulley: Loosen the set screw or bolts that secure the sheave or pulley to the motor shaft. Carefully remove the old sheave or pulley from the motor shaft.
Install the New Sheave or Pulley: Position the new sheave or pulley on the motor shaft and secure it in place with the appropriate set screw or bolts. Ensure it is properly aligned with the other components.
Reattach the Belt: Place the belt back on the new sheave or pulley, following the same path as before.
Adjust Tension: Adjust the tension on the belt by either tightening the tensioner or repositioning the motor to ensure the appropriate tension.
Test the Motor: After replacing the sheave or pulley, turn the power supply back on and test the motor to ensure that it is operating smoothly and effectively.
If you encounter any challenges during the process or if you’re unsure about any of the steps, it’s recommended to consult a professional technician who can provide guidance or assistance. Working with mechanical components requires precision and attention to detail to ensure the proper functioning of the motor.
When replacing an exhaust fan, having the right tools can make the process much smoother and more efficient. Here is a list of some of the essential tools that can be helpful during the replacement of an exhaust fan:
Screwdriver set: A set of screwdrivers with various types and sizes will be necessary for removing screws or fasteners holding the exhaust fan in place.
Wire stripper: A wire stripper can be useful for preparing the wires and ensuring proper connections during the replacement process.
Voltage tester: A voltage tester helps to confirm that the power supply to the exhaust fan has been turned off before starting any work, ensuring safety during the replacement.
Pliers: Standard pliers can be handy for gripping, bending, or cutting wires as needed during the replacement.
Utility knife: A utility knife can be helpful for cutting and trimming materials such as wires, insulation, or packaging.
Ladder or step stool: Depending on the height of the installation, a ladder or step stool might be necessary for safe access to the exhaust fan.
Replacement parts: Ensure you have the appropriate replacement parts for the specific model of the exhaust fan, including the motor, belt, sheave or pulley, or any other components that need replacement.
Flashlight: A flashlight can help illuminate hard-to-reach areas and provide better visibility during the replacement process, especially in dimly lit spaces.
Gloves and safety goggles: Wearing gloves and safety goggles can help protect your hands and eyes from any sharp edges, debris, or dust that might be present during the replacement.
Having these tools readily available can streamline the process of replacing an exhaust fan and help ensure that the job is completed efficiently and safely.
- PURCHASE TOOL KIT HERE:
Stripping wires is a common task in electrical work, and it’s important to do it properly to ensure a secure and reliable connection. Here’s a basic guide on how to strip wire:
Gather the necessary tools: You’ll need wire strippers, which come in various sizes to accommodate different wire gauges. Make sure you have the right size for the wire you’re working with.
Identify the right length: Determine the length of insulation you need to strip from the wire. Typically, this will be about 3/4 inch (19 mm), but it can vary depending on the specific requirements of your project.
Use the wire stripper: Place the wire in the appropriately sized notch in the wire stripper. Be sure to select a notch that is just large enough for the wire. The insulation should fit snugly into the notch without the wire itself being cut.
Apply pressure and pull: Squeeze the handles of the wire stripper to close the blades around the insulation. Apply enough pressure to cut through the insulation but not the wire. Once you’ve applied enough pressure, pull the wire stripper away from the end of the wire, removing the insulation in the process.
Inspect the wire: After stripping, check the wire to ensure that the insulation is completely removed. Make sure there are no nicks or cuts on the wire itself, as this can affect its conductivity and safety.
Practice safety: Always wear appropriate safety gear, such as safety goggles and gloves, when working with wires. Ensure that the wire is not connected to any power source during the stripping process to avoid accidents.
If you don’t have wire strippers, you can use a utility knife, but it’s a more delicate process and requires a steady hand to avoid cutting the wire accidentally.
Always follow the specific guidelines provided for the equipment you are using and refer to any safety instructions provided by the manufacturer.


