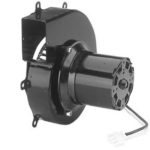
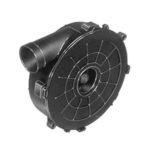
Electric Motor Replacement:
Safety First: Switch off the power supply to the exhaust fan from the circuit breaker to ensure your safety during the replacement process.
Remove the Exhaust Fan Cover: Take off the cover of the exhaust fan by unscrewing or unclipping it, depending on the model of the fan.
Disconnect the Motor Wires: Identify and disconnect the wires that are attached to the motor. Ensure you make note of which wire goes where for the reinstallation process.
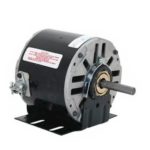
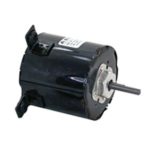
Remove the Motor: Unscrew or unclip the motor from the fan housing. The motor might be attached with screws, so use a screwdriver to remove them. Carefully detach the motor from the fan housing, making sure not to damage any other components.
Install the New Motor: Place the new motor in the same position as the old one and secure it with screws.
Reconnect the Wires: Reconnect the wires to the new motor, ensuring you connect them properly based on your earlier notes.
Test the Exhaust Fan: Turn the power supply back on and test the exhaust fan to ensure the new motor is functioning correctly. Listen for any unusual noises or vibrations that could indicate a problem.
Reattach the Cover: Once you’re satisfied with the motor’s performance, reattach the cover securely.
Final Checks: Double-check all the connections to make sure they are secure. Ensure that the fan is running smoothly and that there are no loose parts.
If you’re unsure about any of the steps or encounter any difficulties, it’s advisable to consult a professional electrician or a technician who can assist you further. Working with electrical components can be dangerous, so it’s crucial to prioritize safety at all times.
Replacing bearings on an exhaust fan can help restore smooth and quiet operation. Here’s a general guide on how to replace bearings on an exhaust fan:
Safety Precautions: Before starting any work, ensure that the power supply to the exhaust fan is turned off to prevent any accidents.
Access the Fan: Remove the cover or grille of the exhaust fan to access the fan blades and the motor assembly. This step may involve unscrewing or unclipping the cover, depending on the model of the fan.
Remove the Motor Assembly: The motor assembly is usually held in place by screws. Remove these screws and detach the motor assembly from the fan housing. Be careful not to damage any other components during this process.
Access the Bearings: Depending on the fan’s design, the bearings may be accessible once the motor assembly is removed, or you may need to disassemble the motor further to access the bearings. Locate the bearings, which are usually small, circular components positioned at either end of the motor shaft.
Remove the Old Bearings: Use the appropriate tools, such as bearing pullers, to carefully remove the old bearings from the motor shaft. Make sure not to damage the shaft during this process.
Install the New Bearings: Place the new bearings onto the motor shaft in the same position as the old ones. Ensure that the new bearings are compatible with the fan’s specifications.
Reassemble the Motor: Reassemble the motor and fan components in the reverse order of disassembly. Make sure to secure the motor assembly back into the fan housing using the appropriate screws.
Test the Fan: Turn the power supply back on and test the exhaust fan to ensure that it is functioning smoothly and quietly.
If you’re unsure about any of the steps or encounter any difficulties, it’s advisable to consult a professional technician who can provide guidance or assistance. Working with mechanical components requires some technical knowledge, so it’s essential to prioritize safety and precision during the replacement process.
Replacing a capacitor on a motor can help restore proper functioning if the motor is experiencing issues such as failure to start, slow operation, or intermittent stopping. Here’s a general guide on how to replace a capacitor on a motor:
Safety Precautions: Before starting any work, ensure that the power supply to the motor is turned off to prevent any electrical accidents.
Access the Motor: Depending on the type of motor, you may need to remove a cover or housing to access the capacitor. This may involve unscrewing or unclipping the cover.
Identify the Capacitor: Locate the capacitor, which is a cylindrical or oval-shaped component with wires attached to it. Make note of how the wires are connected before you remove the old capacitor.
Discharge the Capacitor: Use an insulated screwdriver with a plastic handle to short the terminals of the old capacitor to discharge any stored electrical energy. This step is crucial for your safety.
Remove the Old Capacitor: Disconnect the wires attached to the old capacitor. Take note of their positions to ensure correct reconnection later. Unscrew or unclip the capacitor from the motor.
Install the New Capacitor: Match the specifications of the old capacitor with the new one, ensuring that it has the same voltage and microfarad (μF) rating. Install the new capacitor in the same position as the old one.
Reconnect the Wires: Connect the wires to the new capacitor, ensuring that they are connected to the appropriate terminals based on your earlier notes.
Test the Motor: Turn the power supply back on and test the motor to ensure that it starts and operates properly.
If you’re unsure about any of the steps or encounter any difficulties, it’s advisable to consult a professional electrician or a technician who can provide guidance or assistance. Working with electrical components can be dangerous, so it’s crucial to prioritize safety and precision during the replacement process.
Replacing the belt on an exhaust fan is necessary when the belt becomes worn, damaged, or broken, causing the fan to operate inefficiently. Here’s a general guide on how to replace the belt on an exhaust fan:
Turn Off Power: Before beginning any work, ensure that the power supply to the exhaust fan is turned off to prevent any accidents.
Access the Belt: Remove the cover or housing of the exhaust fan to access the belt assembly. This step might involve unscrewing or unclipping the cover, depending on the specific model of the exhaust fan.
Locate the Belt and Tensioner: Identify the belt and the tensioner pulley. Note how the belt is threaded through the system before removing it.
Release Tension: Release the tension on the belt by either loosening the tensioner pulley or moving the motor to create slack in the belt. This will make it easier to remove the old belt.
Remove the Old Belt: Slip the old belt off the pulleys and remove it from the system. Take note of the belt’s orientation and the way it was threaded through the pulleys.
Install the New Belt: Position the new belt over the pulleys in the same configuration as the old one. Ensure that the belt is properly aligned and seated on the pulleys.
Adjust Tension: Adjust the tension on the new belt by either tightening the tensioner pulley or adjusting the position of the motor to create the proper tension.
Test the Fan: After replacing the belt, turn the power supply back on and test the exhaust fan to ensure that it is operating smoothly and effectively.
If you encounter any difficulties during the process or if you are unsure about any of the steps, it’s recommended to consult a professional technician who can assist you further. Working with mechanical components can be challenging, so it’s important to prioritize safety and precision during the replacement process.
Replacing a sheave or pulley on a motor requires careful attention to detail and precision to ensure the motor functions properly. Here’s a general guide on how to replace a sheave or pulley on a motor:
Safety Precautions: Before you begin, make sure to turn off the power supply to the motor to avoid any accidents.
Access the Motor: Depending on the motor’s design, you may need to remove a cover or housing to access the sheave or pulley. This step may involve unscrewing or unclipping the cover or housing.
Release the Tension: If the sheave or pulley is connected to a belt, release the tension on the belt by either loosening the tensioner or moving the motor to create slack.
Remove the Belt: Slip the belt off the sheave or pulley, ensuring you take note of the way it is threaded through the system for reinstallation.
Detach the Old Sheave or Pulley: Loosen the set screw or bolts that secure the sheave or pulley to the motor shaft. Carefully remove the old sheave or pulley from the motor shaft.
Install the New Sheave or Pulley: Position the new sheave or pulley on the motor shaft and secure it in place with the appropriate set screw or bolts. Ensure it is properly aligned with the other components.
Reattach the Belt: Place the belt back on the new sheave or pulley, following the same path as before.
Adjust Tension: Adjust the tension on the belt by either tightening the tensioner or repositioning the motor to ensure the appropriate tension.
Test the Motor: After replacing the sheave or pulley, turn the power supply back on and test the motor to ensure that it is operating smoothly and effectively.
If you encounter any challenges during the process or if you’re unsure about any of the steps, it’s recommended to consult a professional technician who can provide guidance or assistance. Working with mechanical components requires precision and attention to detail to ensure the proper functioning of the motor.
Stripping wires is a common task in electrical work, and it’s important to do it properly to ensure a secure and reliable connection. Here’s a basic guide on how to strip wire:
Gather the necessary tools: You’ll need wire strippers, which come in various sizes to accommodate different wire gauges. Make sure you have the right size for the wire you’re working with.
Identify the right length: Determine the length of insulation you need to strip from the wire. Typically, this will be about 3/4 inch (19 mm), but it can vary depending on the specific requirements of your project.
Use the wire stripper: Place the wire in the appropriately sized notch in the wire stripper. Be sure to select a notch that is just large enough for the wire. The insulation should fit snugly into the notch without the wire itself being cut.
Apply pressure and pull: Squeeze the handles of the wire stripper to close the blades around the insulation. Apply enough pressure to cut through the insulation but not the wire. Once you’ve applied enough pressure, pull the wire stripper away from the end of the wire, removing the insulation in the process.
Inspect the wire: After stripping, check the wire to ensure that the insulation is completely removed. Make sure there are no nicks or cuts on the wire itself, as this can affect its conductivity and safety.
Practice safety: Always wear appropriate safety gear, such as safety goggles and gloves, when working with wires. Ensure that the wire is not connected to any power source during the stripping process to avoid accidents.
If you don’t have wire strippers, you can use a utility knife, but it’s a more delicate process and requires a steady hand to avoid cutting the wire accidentally.
Always follow the specific guidelines provided for the equipment you are using and refer to any safety instructions provided by the manufacturer.
When replacing an exhaust fan, having the right tools can make the process much smoother and more efficient. Here is a list of some of the essential tools that can be helpful during the replacement of an exhaust fan:
Screwdriver set: A set of screwdrivers with various types and sizes will be necessary for removing screws or fasteners holding the exhaust fan in place.
Wire stripper: A wire stripper can be useful for preparing the wires and ensuring proper connections during the replacement process.
Voltage tester: A voltage tester helps to confirm that the power supply to the exhaust fan has been turned off before starting any work, ensuring safety during the replacement.
Pliers: Standard pliers can be handy for gripping, bending, or cutting wires as needed during the replacement.
Utility knife: A utility knife can be helpful for cutting and trimming materials such as wires, insulation, or packaging.
Ladder or step stool: Depending on the height of the installation, a ladder or step stool might be necessary for safe access to the exhaust fan.
Replacement parts: Ensure you have the appropriate replacement parts for the specific model of the exhaust fan, including the motor, belt, sheave or pulley, or any other components that need replacement.
Flashlight: A flashlight can help illuminate hard-to-reach areas and provide better visibility during the replacement process, especially in dimly lit spaces.
Gloves and safety goggles: Wearing gloves and safety goggles can help protect your hands and eyes from any sharp edges, debris, or dust that might be present during the replacement.
Having these tools readily available can streamline the process of replacing an exhaust fan and help ensure that the job is completed efficiently and safely.
- PURCHASE TOOL KIT HERE:


